前言
在b站上刷到了Erik的 【25分钟技术入门】兄弟,转过去,真有急事 | 超简洁的前后端通信教程 ,正巧最近在学习Vue的相关知识,在这里写下这篇博客以及我的一些理解记录。本篇博客用到的一些框架:
- Vue:一款流行的前端 JavaScript 框架,用于构建交互式的用户界面。// 前端
- Ant Design :一个基于 React 的 UI 组件库,它提供了一套丰富的、美观的、易于使用的组件,帮助开发者快速构建出具有统一风格的用户界面。 // 前端组件
- Express :一个流行的 Node.js Web 应用程序框架,它简化了构建 Web 应用和 API 的过程。Express 提供了一系列强大的功能和工具,使得开发者可以更轻松地处理 HTTP 请求、路由、中间件等任务。 // 用作后端
- axios :Axios 是一个基于 Promise 的 HTTP 客户端,用于浏览器和 Node.js 环境中发送 HTTP 请求。它是一个流行的第三方库,广泛应用于前端开发中,用于与后端服务进行数据交互。 // 前后端相连
- nodemon:一个非常方便的Node.js开发工具,它可以帮助开发者在开发过程中自动监视文件的变化并重新启动Node.js应用程序。
并附上官方文档:
简介 | Vue.js (vuejs.org)
Ant Design of Vue - Ant Design Vue (antdv.com)
Express 中文网 (nodejs.cn)
起步 | Axios中文文档 | Axios中文网 (axios-http.cn)
下文不介绍 ,如有需要可以参照上一篇博客: Vue——导入bootstrap5
Vue导入ant-design
Ant Design of Vue - Ant Design Vue (antdv.com) 的官方文档中有详细介绍,这里只说一下我是怎么创建的
1.安装ant-design组件
1
| npm i --save ant-design-vue@next
|
next表示最新版本,i => install
2.注册
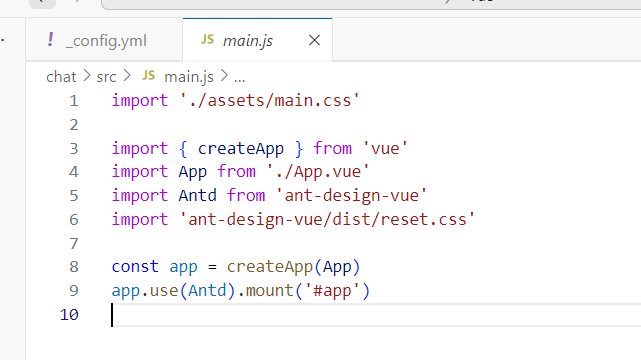
在vue项目中的main.js中加入ant-design的注册,并稍稍对main.js做了修改
1
2
| import Antd from 'ant-design-vue'
import 'ant-design-vue/dist/reset.css'
|
3.图标
值得注意的是,如果你需要使用到ant design的图标icon时,需要安装相关的组件:
1
| npm install --save @ant-design/icons-vue
|
4.测试
我们使用一个a-input组件展示一下icon,其余的相关组件可以在官方文档查阅
1
2
3
4
5
6
7
8
9
10
11
12
| <template>
<div class="components-input-demo-presuffix">
<a-input v-model:value="userName" placeholder="Basic usage">
<template #prefix>
<user-outlined />
</template>
</a-input>
</div>
</template>
<script setup>
import { UserOutlined } from '@ant-design/icons-vue'; // 需要引入icon
</script>
|

安装 Axios
我们可以通过npm快速的安装axios
起步 | Axios中文文档 | Axios中文网 (axios-http.cn)
构建前端页面
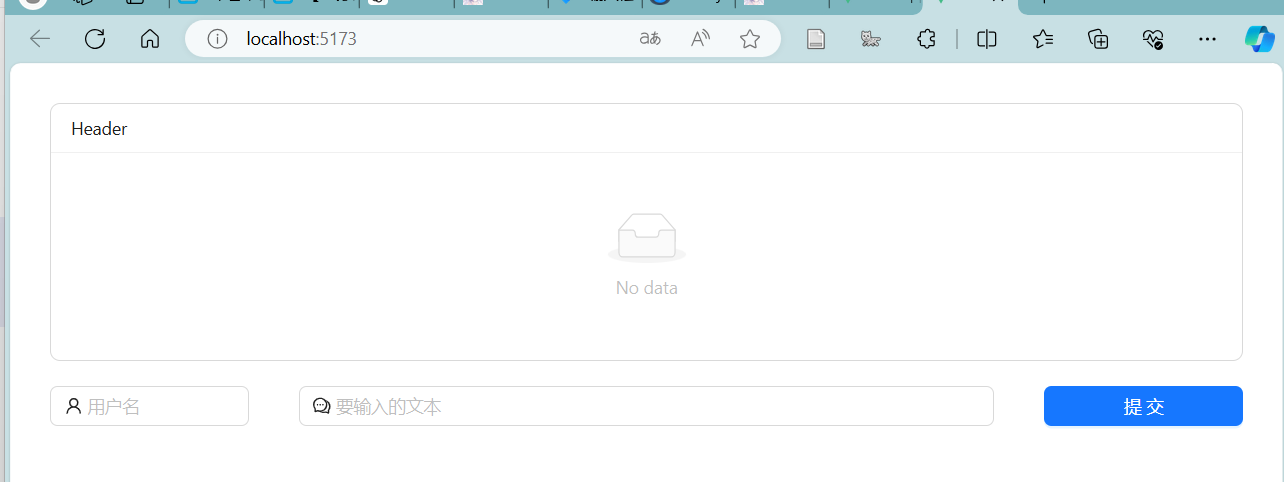
我们用一个list、两个输入框分别输入用户名和信息、一个提交按钮来做一个简单的即时聊天网站
1
2
3
4
5
6
7
8
9
10
11
12
13
14
15
16
17
18
19
20
21
22
23
24
25
26
27
28
29
30
31
32
33
34
35
36
37
| <template>
<div>
<a-list size="small" bordered :data-source="messageList"> <!-- 使用list展示消息 -->
<template #renderItem="{ item }">
<a-list-item>{{ item.username }} : {{ item.message }}</a-list-item> <!-- 展示 用户名:消息 -->
</template>
<template #header>
<div>Header</div>
</template>
</a-list>
<a-row style="margin-top:20px"> <!-- 注意col的总和为24 -->
<a-col span="4">
<a-input v-model:value="username" placeholder="用户名">
<template #prefix>
<UserOutlined /> <!-- icon -->
</template>
</a-input>
</a-col>
<a-col span="14" offset="1">
<a-input v-model:value="message" placeholder="要输入的文本">
<template #prefix>
<CommentOutlined /> <!-- icon -->
</template>
</a-input>
</a-col>
<a-col span="4" offset="1">
<a-button type="primary" @click="handleClickSubmit" style="width: 100%;"> 提交 </a-button>
</a-col>
</a-row>
</div>
</template>
<script setup>
// 未写
</script>
|
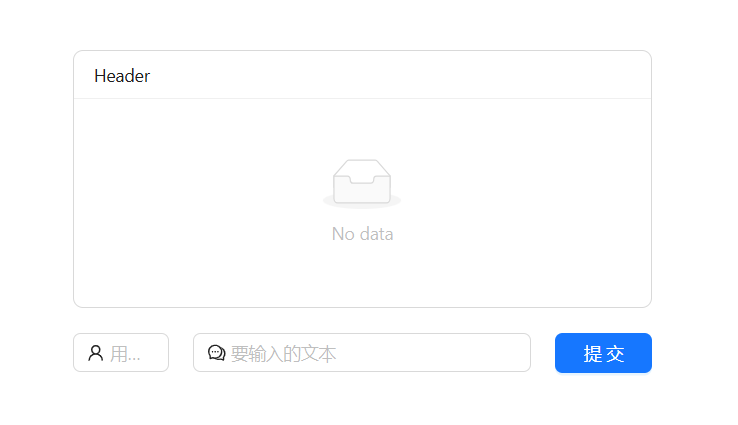
效果如图所示
要进行接下来的提交操作,我们需要完善<script> 标签中的内容
1
2
3
4
5
6
7
8
9
10
11
12
13
14
15
16
17
18
19
20
21
22
23
24
25
26
27
28
29
30
31
32
33
34
35
36
37
38
39
40
41
42
43
44
45
46
| <script setup>
import {ref} from 'vue'
import { UserOutlined,CommentOutlined } from '@ant-design/icons-vue'; // 两个icon
import axios from 'axios'; // axios工具
import { message as ant_message } from 'ant-design-vue'; // 我们这里使用了ant_message的信息框
const message = ref(null) // 与第二个input框绑定
const username = ref(null) // 与第一个input框绑定
const messageList = ref([]) // 一个信息列表,储存所有用户名及消息
// 按钮事件: 将数据通过axios发送到后端,这里还没写后端
// 暂定url为:http://localhost:8080/message/send 后文会介绍如何通过express设置
const handleClickSubmit = async () => {
try{
const res = (await axios.request({ // await 等待结果
url: "http://localhost:8080/message/send",
method: "POST",
data: {
username: username.value,
message: message.value,
}
})).data;
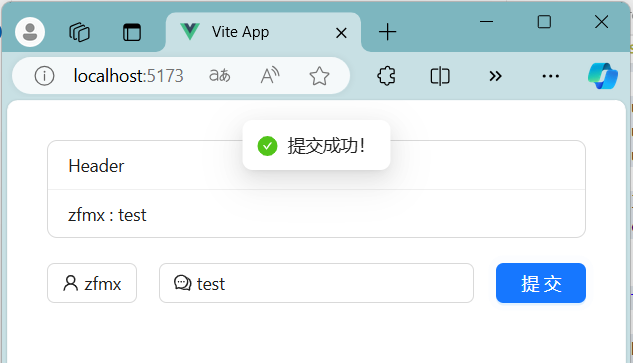
if (res.status == 200){
ant_message.success("提交成功!")
}
}catch (err) {
ant_message.error("提交异常!")
}finally{
GetMessageList(); // 获取信息函数
}
}
// 获取信息函数,暂定url为http://localhost:8080/message
const GetMessageList = async() => {
const res = (await axios.request({
url: "http://localhost:8080/message",
method: "GET",
data: {}
})).data;
messageList.value = res;
}
GetMessageList();
setInterval(()=>{
GetMessageList();
},1000)
</script>
|
配置express
Express 中文网 (nodejs.cn) 官方文档中同样有相关的详细配置介绍
1.创建一个新的文件夹

2.安装express
在命令行中进入目录
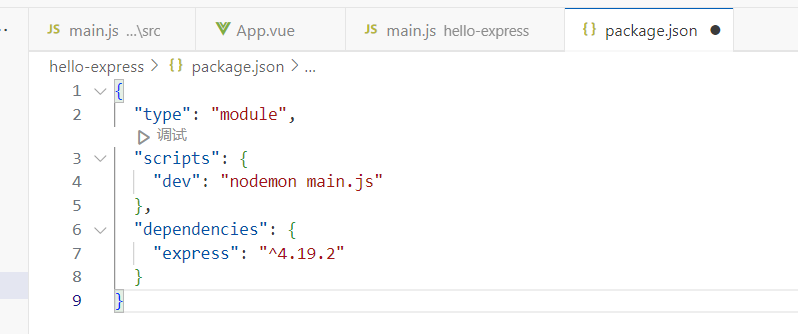
3.修改package.json
添加了以下内容:
1
2
3
4
| "type": "module",
"scripts": {
"dev": "nodemon main.js"
},
|
这里的nodemon是在前言介绍的工具,可以通过npm安装
4.创建js文件
这里我叫做main.js
1
2
3
4
5
| import express from 'express'
const app = express()
app.listen(8080,()=>{
console.log("服务器开启成功");
})
|
如此访问8080端口即可看到控制台的启动提示。
后端构建
要注意的是,当我们同时运行前后端项目时,会遇到跨域问题:网络应用程序中,当一个域(或者是协议、端口号)的页面试图请求另一个域下的资源时所遇到的限制或问题。这个问题通常是由浏览器的安全策略所导致的,主要是为了防止恶意网站利用用户的浏览器发送跨域请求,窃取用户数据或进行其他恶意行为。
我们通过cors解决跨域问题:跨域资源共享(CORS,Cross-Origin Resource Sharing)是一种机制,允许服务器声明哪些源(域名、协议、端口)可以通过浏览器访问其资源。CORS 可以让 Web 服务器决定是否允许跨域的请求,以及哪些请求方法(如 GET、POST、PUT、DELETE 等)和头部信息是允许的。
接下来我们通过express完善后端的构建
1
2
3
4
5
6
7
8
9
10
11
12
13
14
15
16
17
18
19
20
21
22
23
24
25
26
| import express from 'express'
import cors from 'cors'
const app = express()
app.use(cors())
app.use(express.json())
app.use(express.urlencoded({extended: false}))
app.listen(8080,()=>{
console.log("服务器开启成功");
})
const messageList =[];
app.post("/message/send", async (req, res) => {
const { username, message } = req.body;
messageList.push({username, message});
res.json({
status: 200,
msg: "ok",
})
})
app.get("/message", async (req, res)=>{
res.json(messageList)
})
|
至此完成了该项目的代码编写
效果
我们同时开启前后端服务
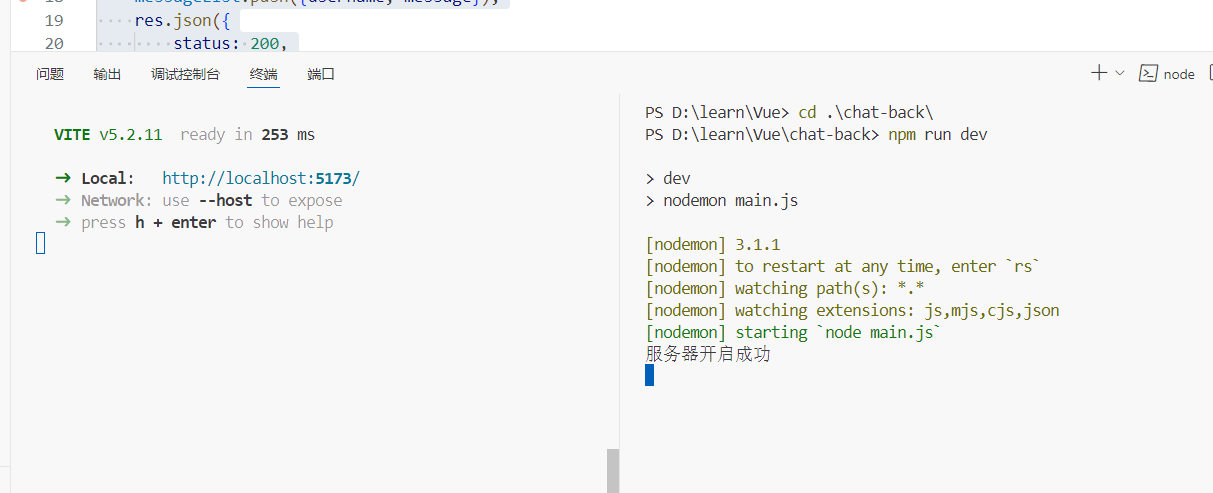
访问前端页面
尝试输入信息提交
我们开启两个网页,观察实时性
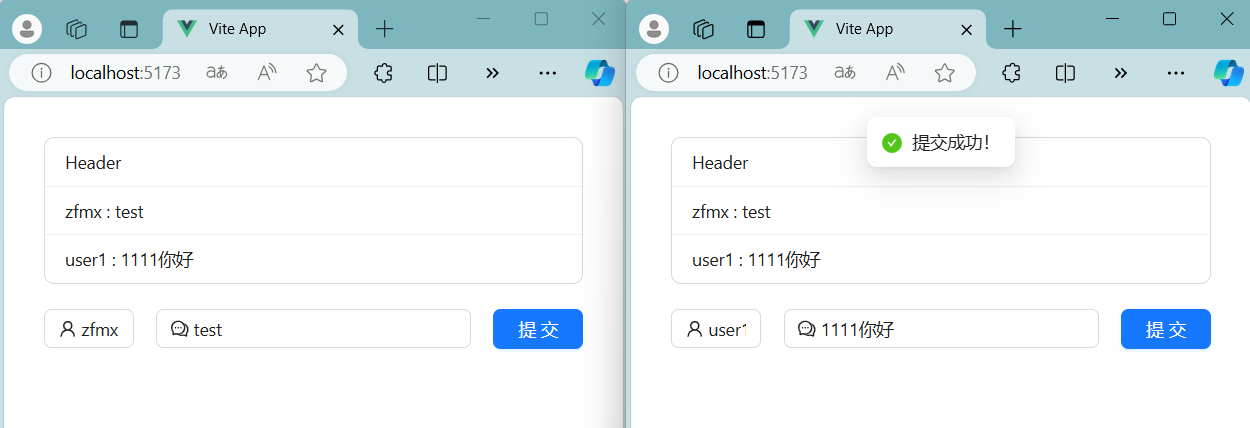
由于前端刷新函数设置了1000毫秒,所以前端页面能够实现1s之内容忍程度下的即时通信
注: 若npm下载慢,使用cnpm (国内镜像npm) npm install cnpm 安装
